NOTE: This was going to be a twitter thread but twitter was down? So this is a lazy blog post…

Anyone used to Digilent would expect this to be based on Zynq or similar – the fact the device has USB + ethernet ports makes it a pretty much sure thing! Taking the screws off the bottom gives us this view:
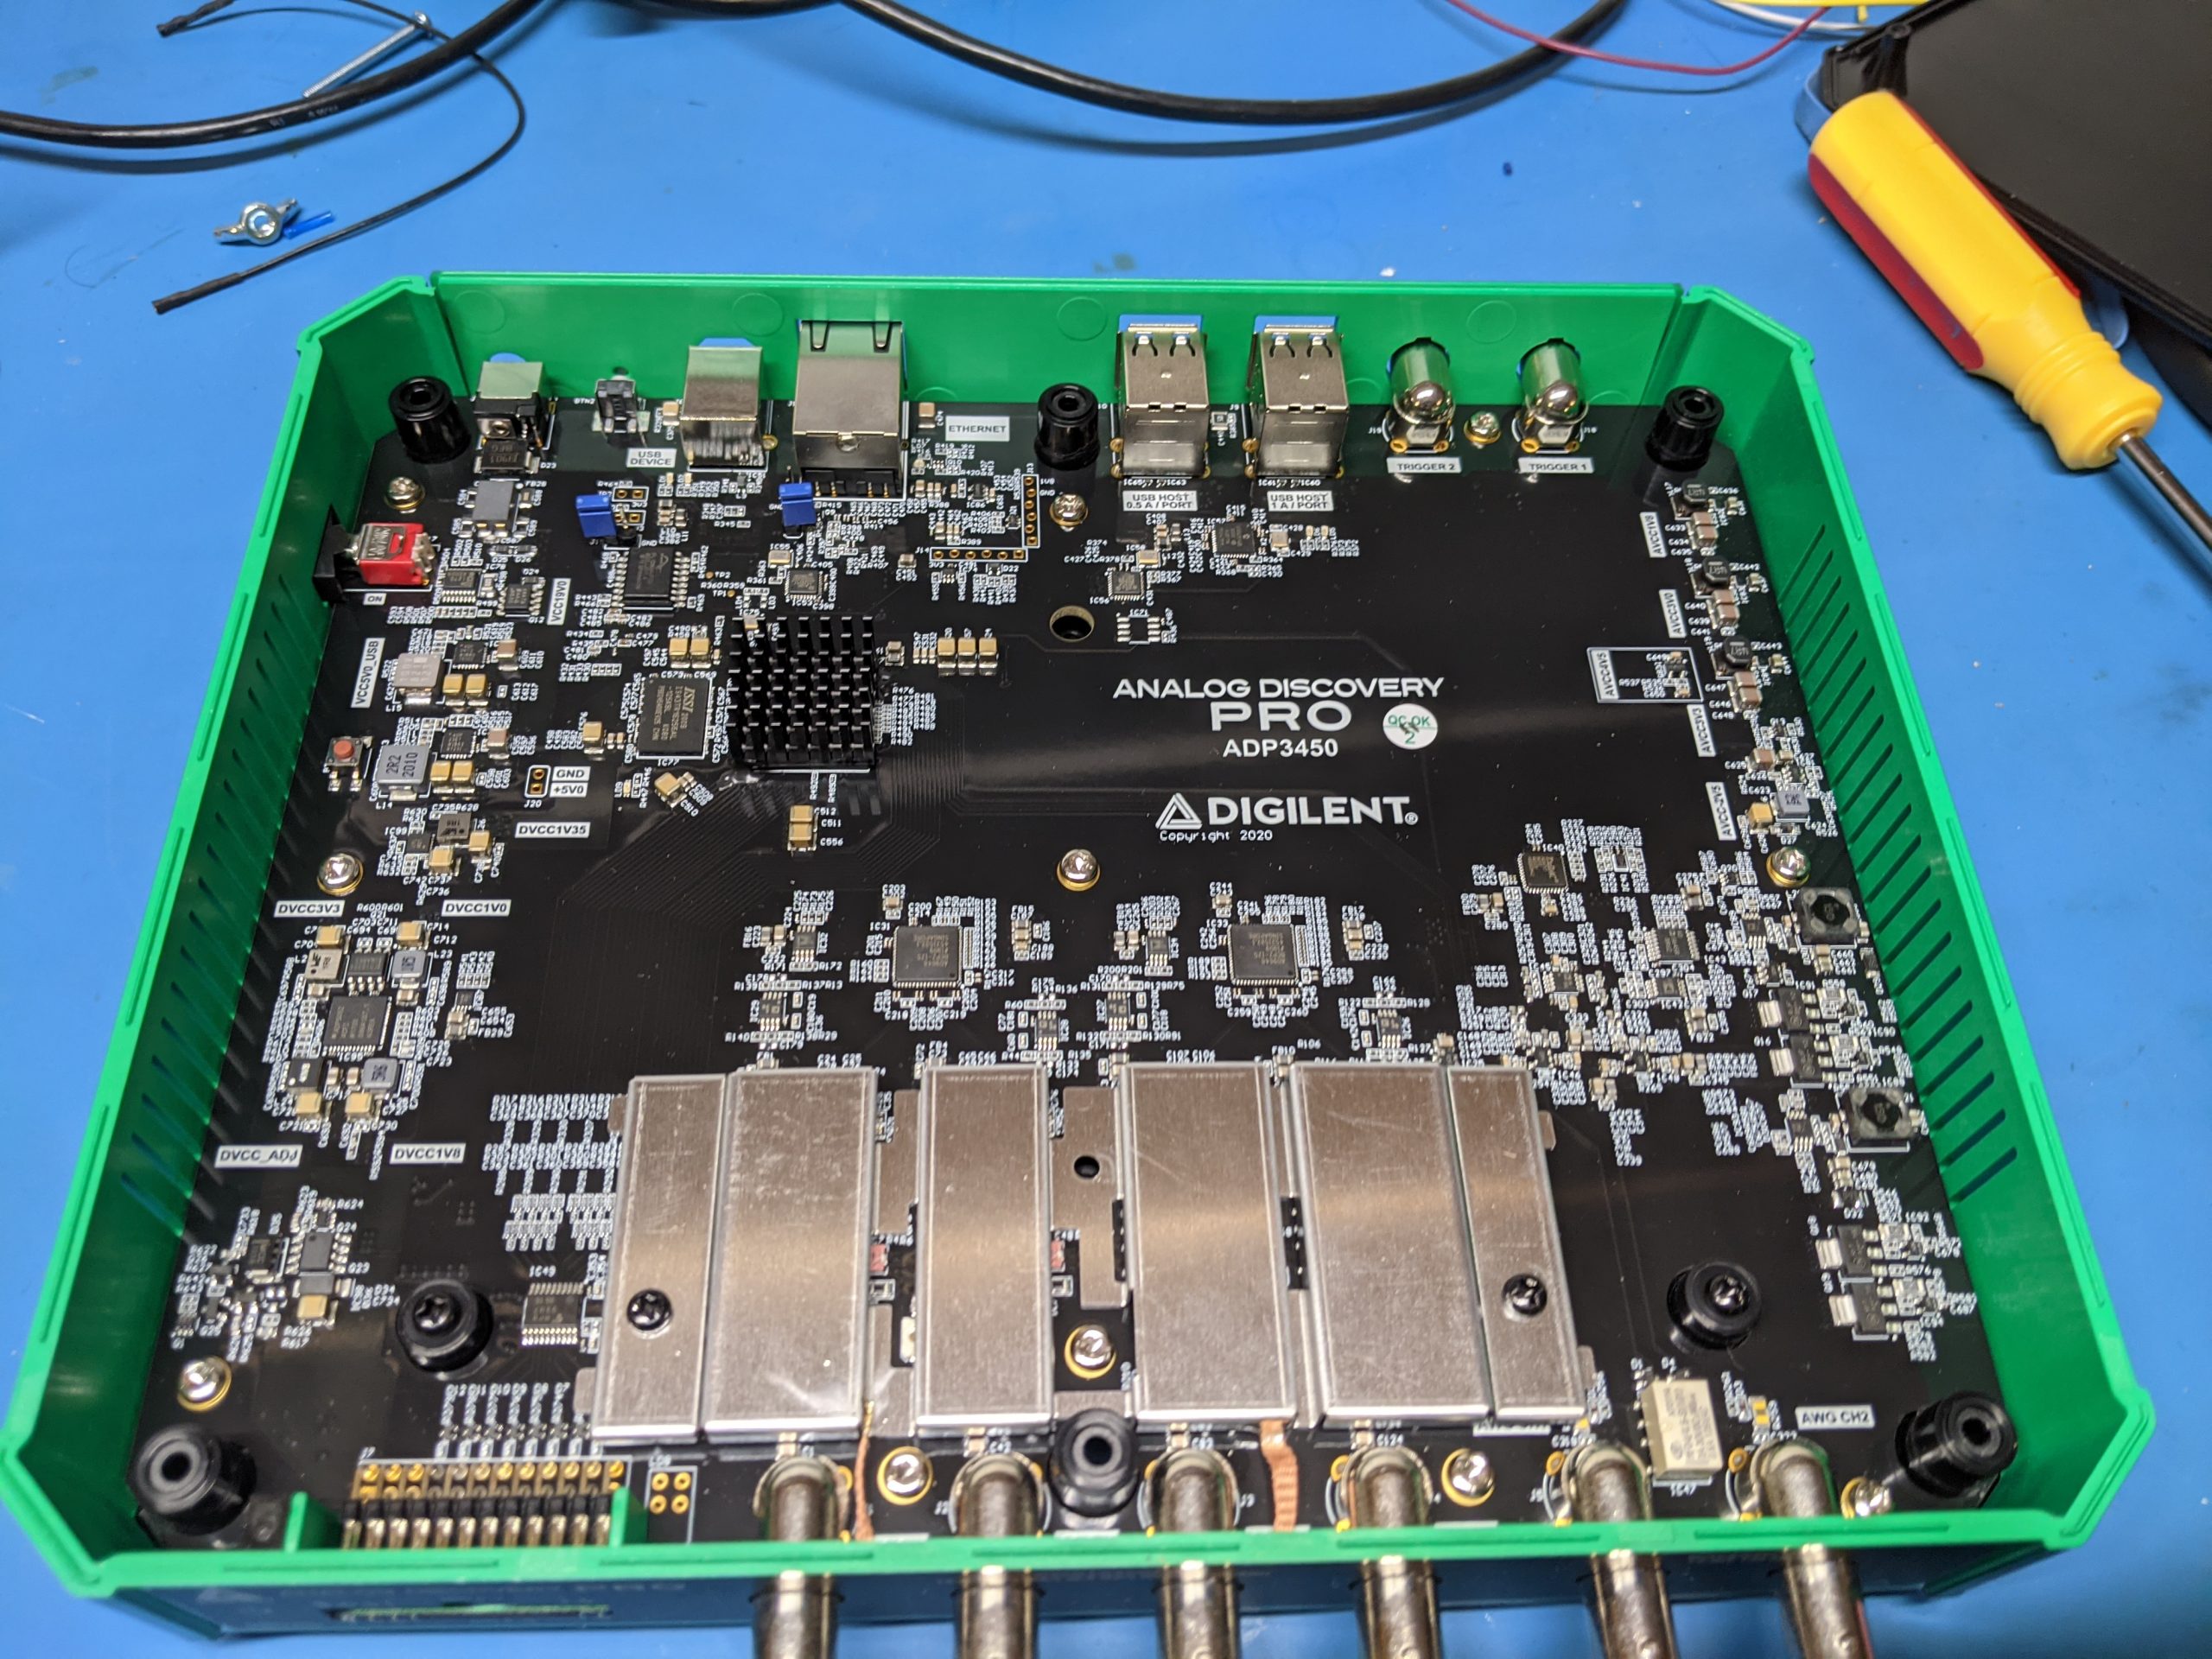
The upper left has a BGA with a heatsink on it – nothing too serious so a small Zynq maybe, or a helper FPGA? The power supplies and similar are all well labeled.
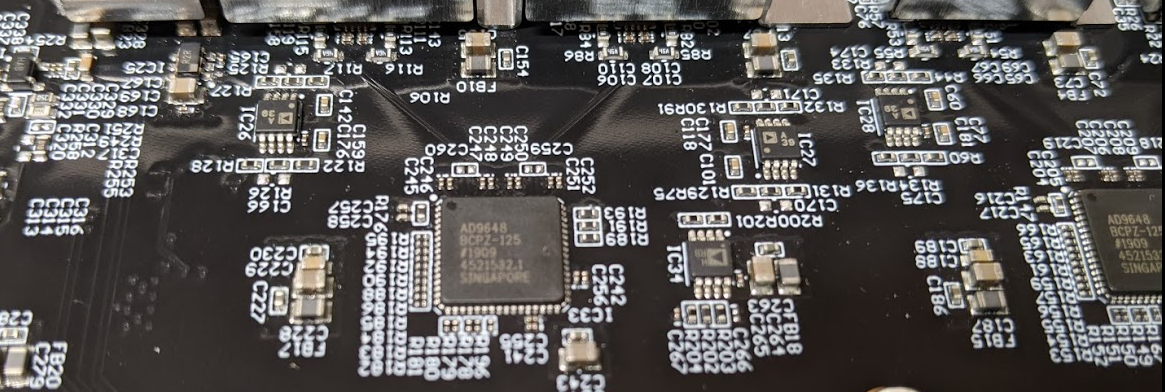
The ADC is a AD9648 – two of them on the 4-channel device. There are a few analog parts you can see, but a lot is hidden behind that metal shield:
Moving the metal shield up reveals it’s mostly just the relays for range switching:

Switching back to digital section, we can see the routing of the Digital IO goes to that BGA part, with DDR memory beside it:

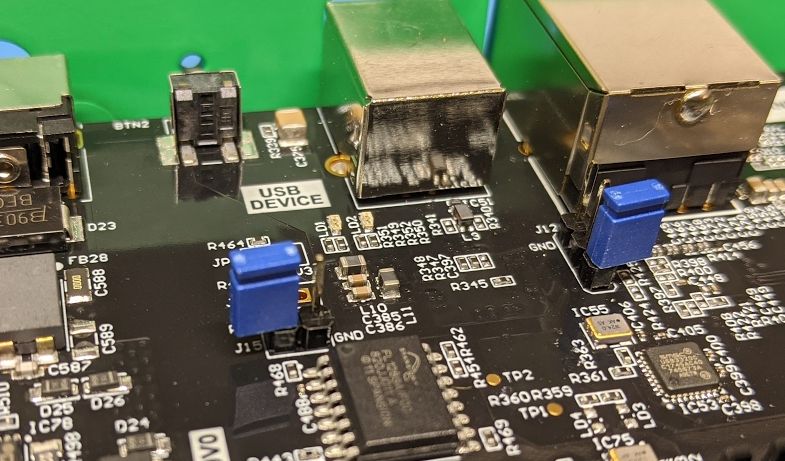
Boldly a few jumpers hanging out here too – this is how it was shipped to me:
Removing the torx bolts is needed to see any more than this…

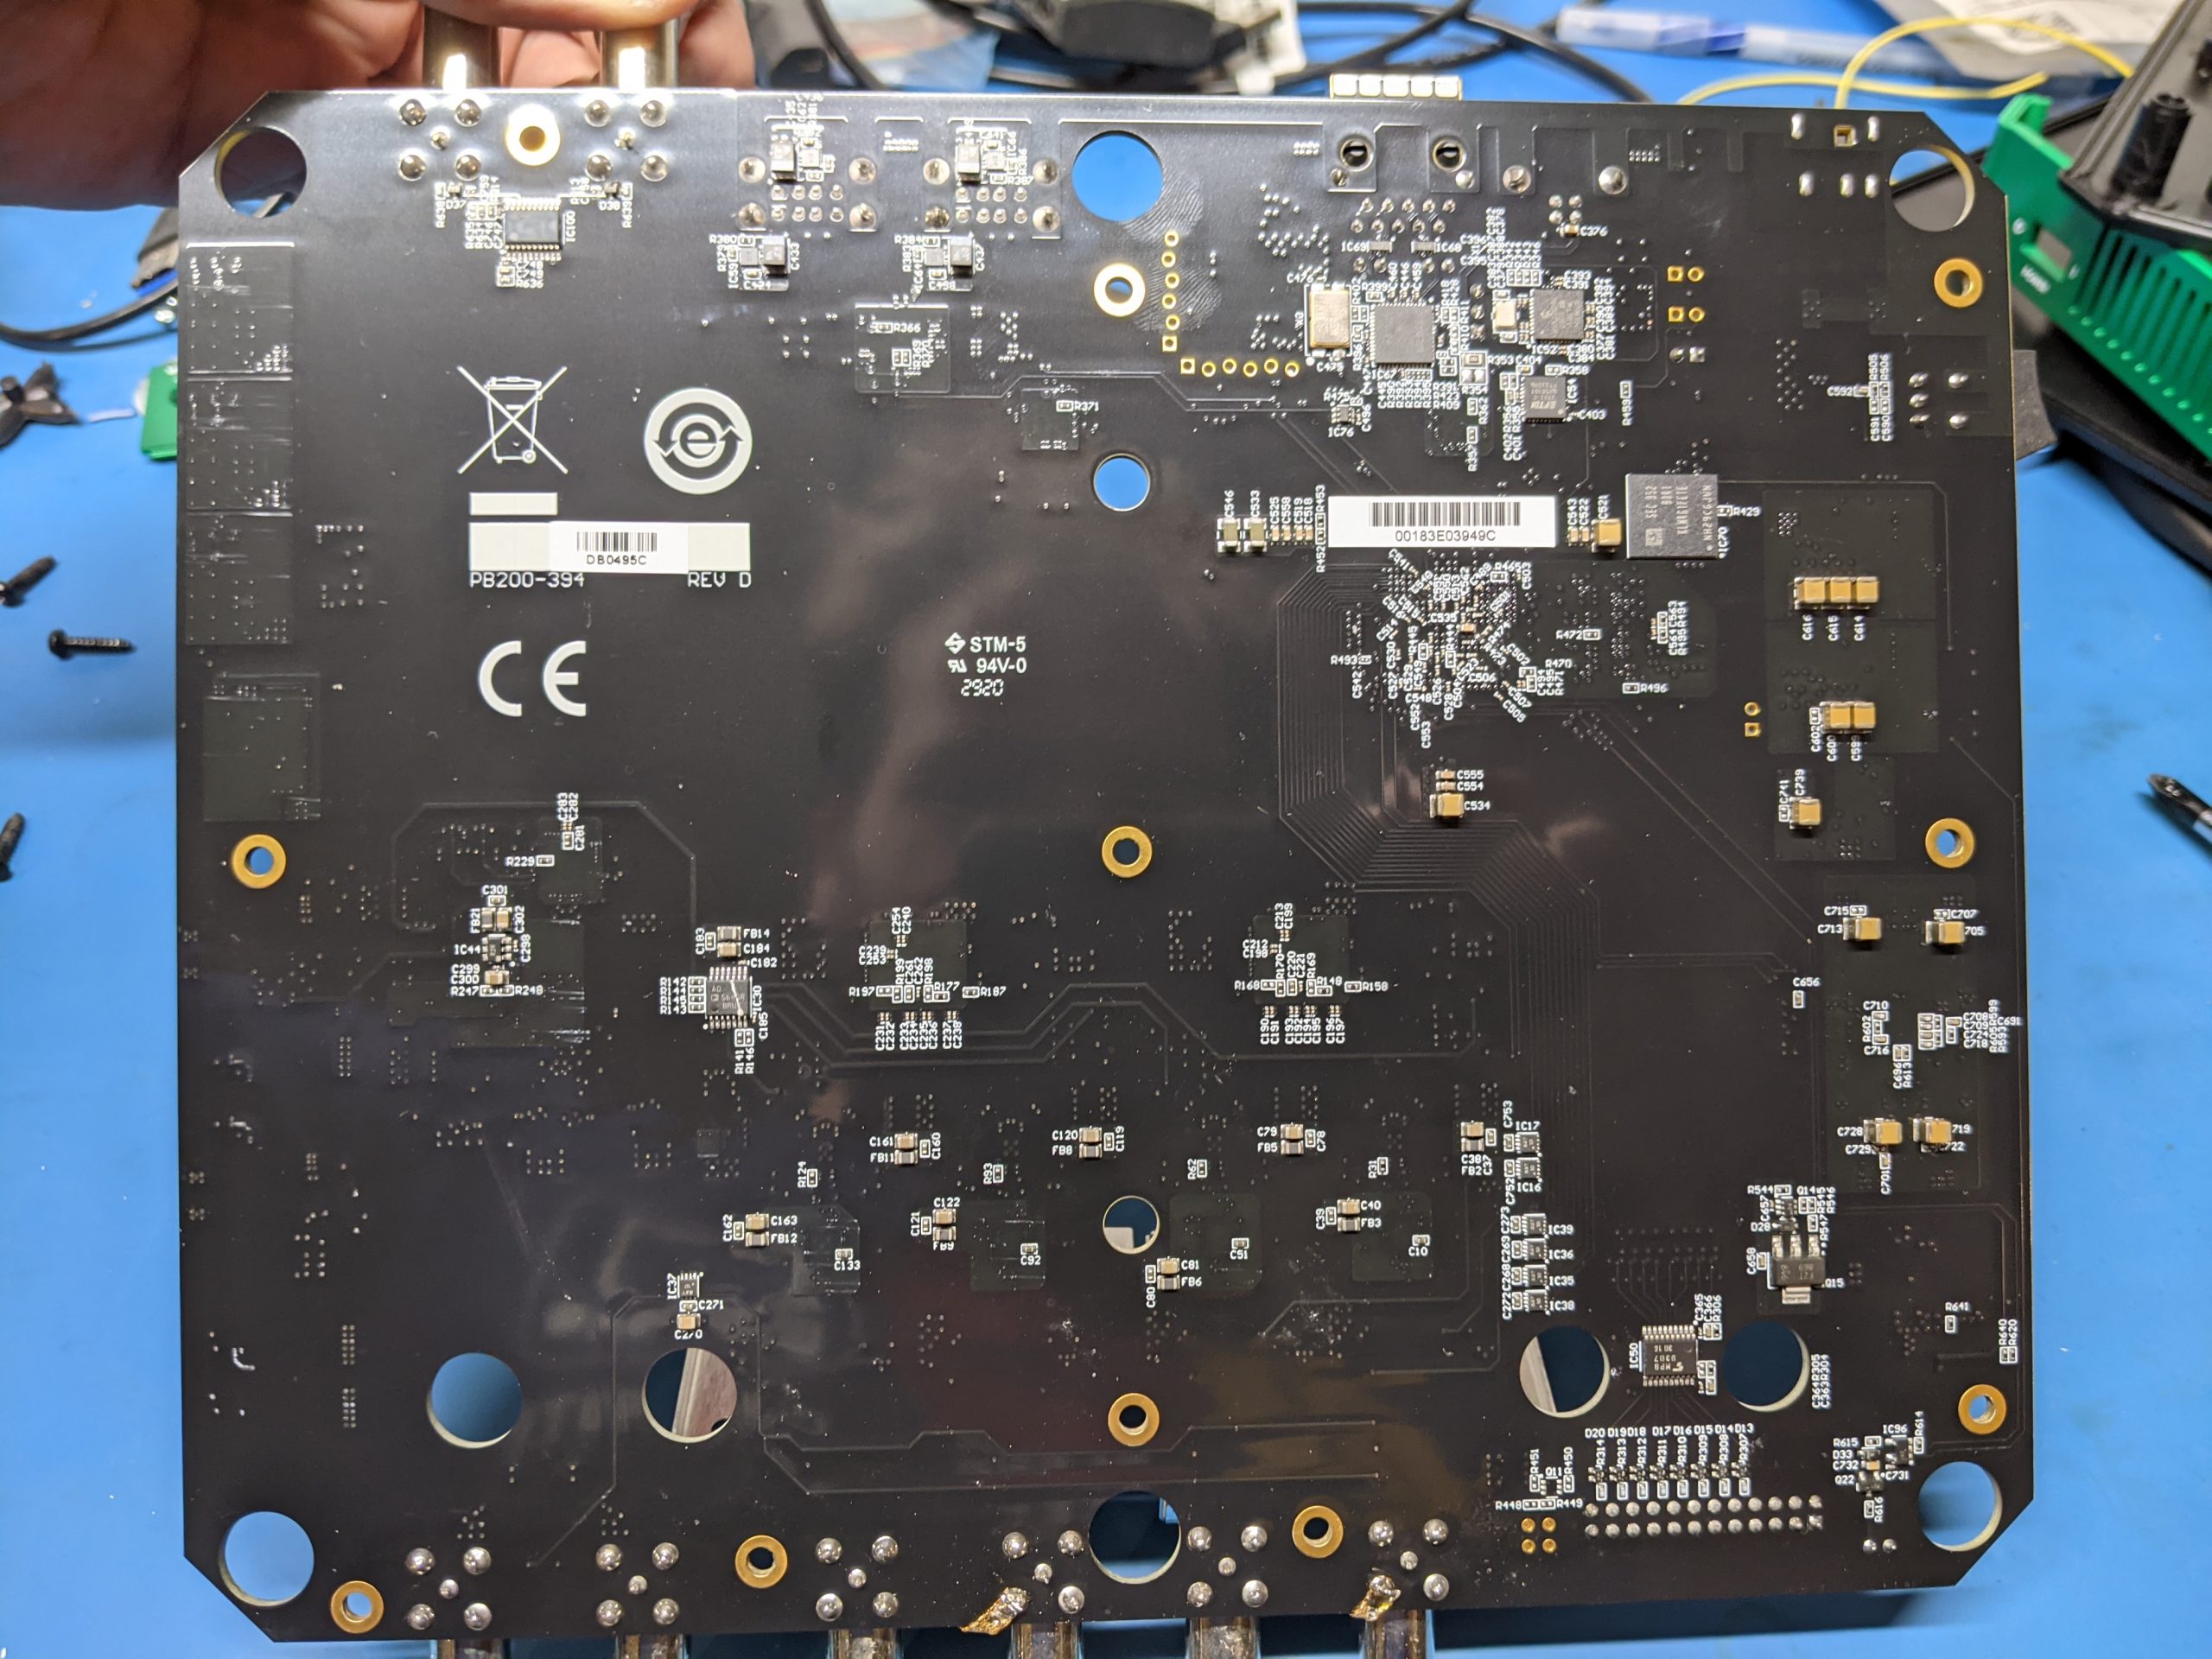
And now we’ve got it – not too much on the bottom:
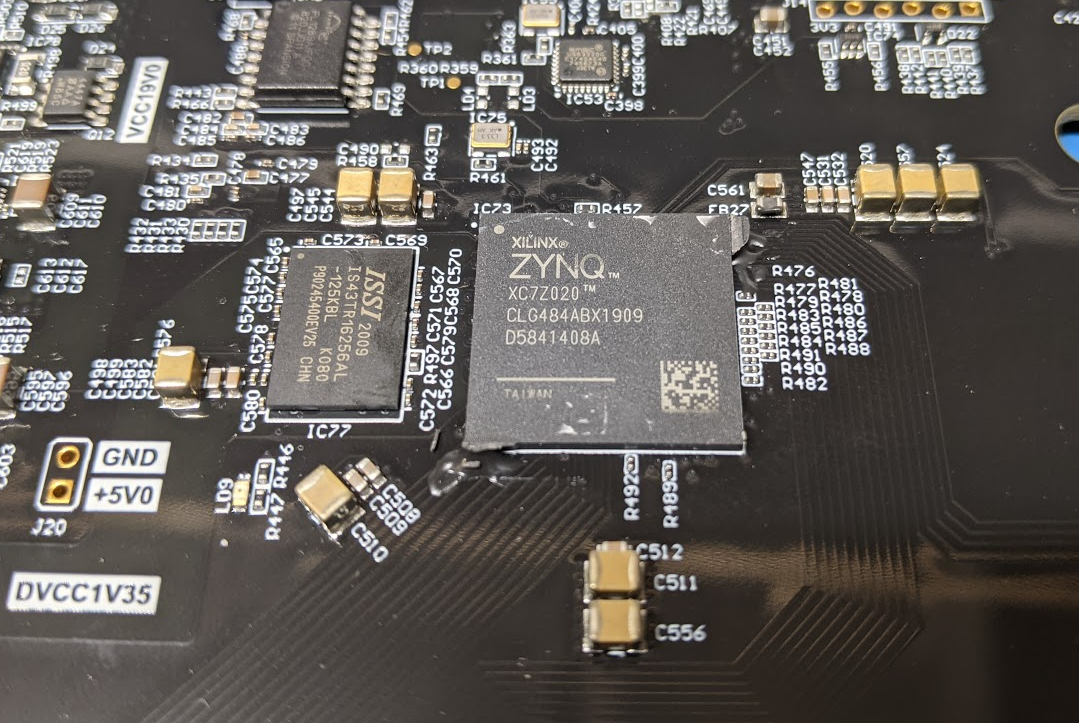
So the final question – what’s under the heatsink? That turns out to be the magic part of this.
Where are the termination resistors on the DDR chip I wondered though? Do you not need them when it’s so close or do they use series resistance of the drivers? They don’t show up on the front or back from what I see!
The resistors to the right of the Zynq chip (R476, R477, etc) are about 40 ohms. I originally assumed they would be for signals going to the DAC (which they may be), but will need to scope them and see what shows up!
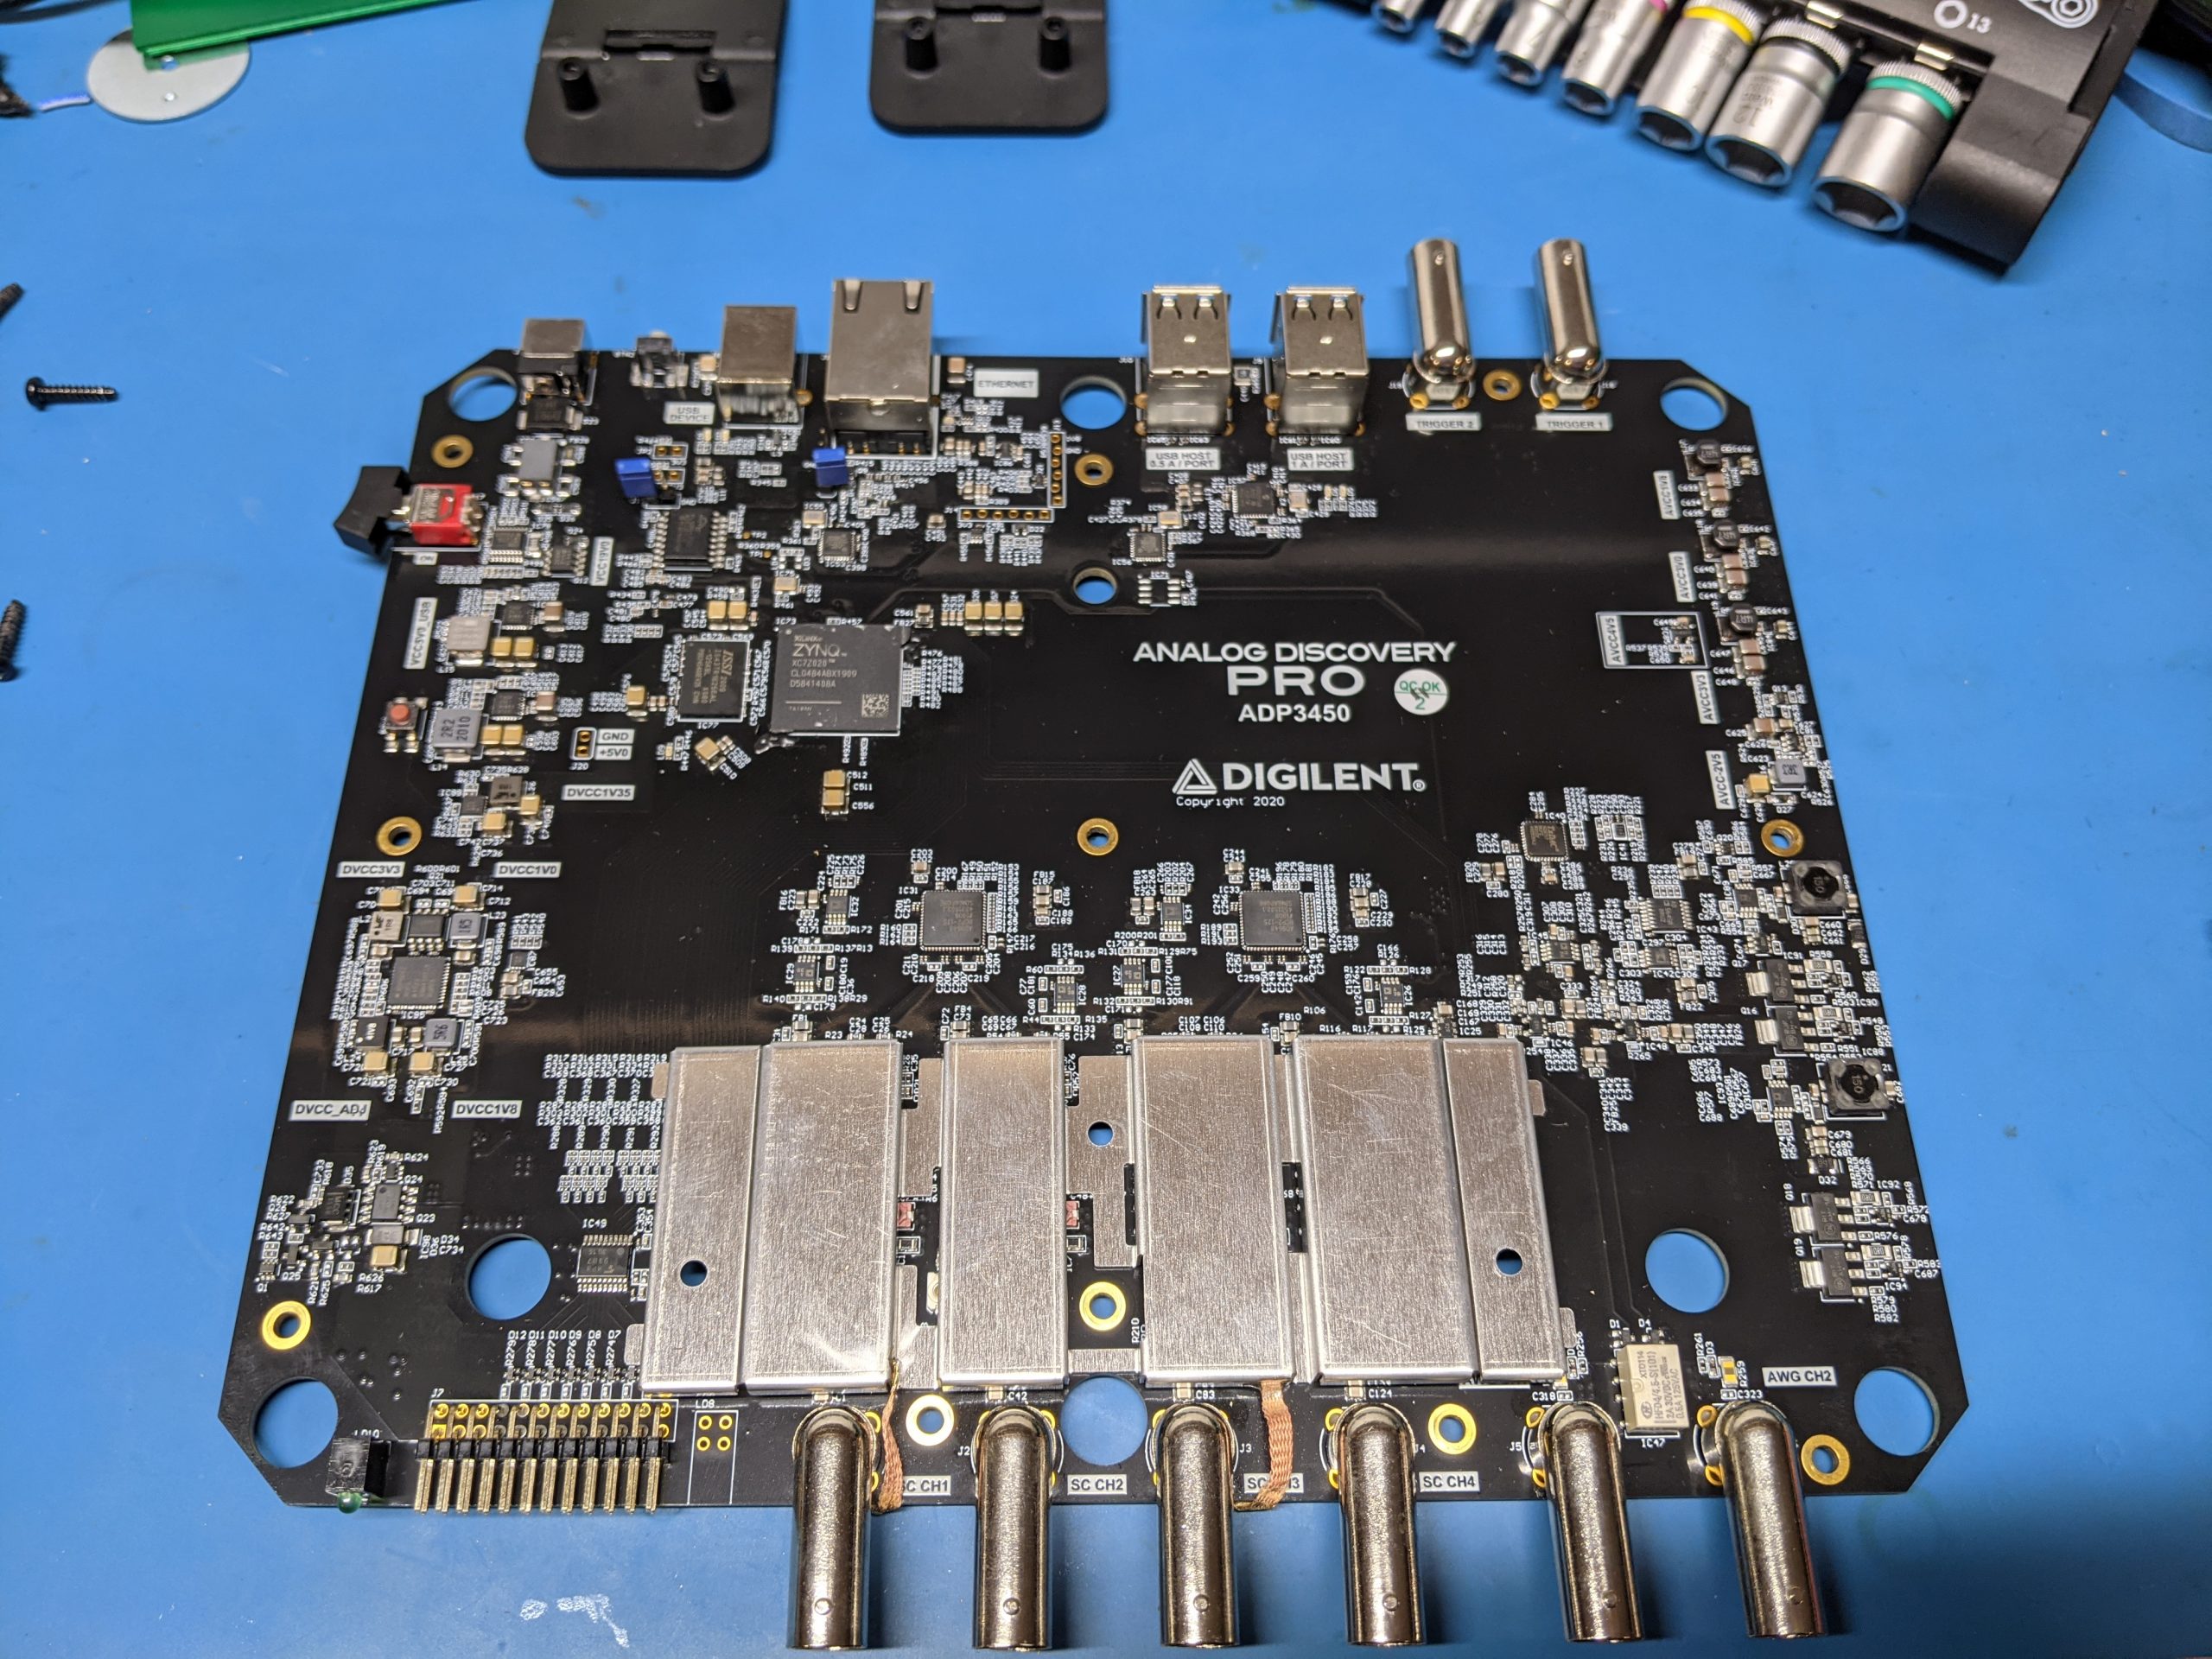
As a little bonus here is another better quality photo of the top:
Bonus – how to remove the heatsink?